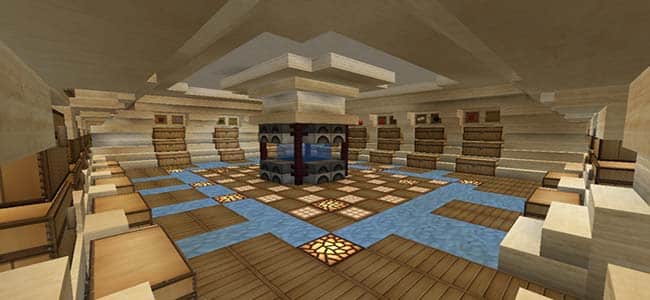
Storage rooms are one of the most most practical survival Minecraft builds. They store your valuables and you spend a lot of time in there dropping off and picking up your belongings. If you’re spending so much time in there, you may as well make it look nice!
There are three Minecraft storage room design principles that you should follow: keep it practical, keep it organized, and keep it protected. Following these three principles will ensure that you build a storage room that is easy to navigate and safe from enemies.
Keep reading and you will learn how to build a storage room in Minecraft!
Practical Storage Room Design
It’s important that the design and layout of your storage room is easy to use. For example, if the room is too large you may find yourself running too far to retrieve items. Make the smallest room for the amount of things you expect to store (while still having some expansion room).
Also, make sure your chests accessible. If you place chests too high up you won’t be able to put your items in them.
You should have a central point in your storage room design with the following: a crafting table, a furnace, an ender chest, enchanting table, brewing stand, and other similar blocks. With this central point, you can easily access the things that you use the most in the game. You could go a step further and build a mini library with bookshelves in the middle to do your enchanting and potion brewing.
Make sure you keep a chest of some commonly used things like armor, food and cooking items, and tools. Supplies that you use less commonly like cobblestone or flowers could go deeper into your storage room.
Organized Chest Storage
You will want to make sure you can find your items when you need them. Keep your storage room chests labelled with signs or item frames so you know what belongs in each chest. Also, keep similar items grouped together like building blocks, animal drops, mob drops, and so on.
It is a good idea to divide chests into broad categories and once you have a full chest you can divide them further. For example, keep a chest of wools, but once it’s full you can have a chest for each wool color.
Here is a list of categories for dividing your Minecraft storage chests:
- Your most powerful weapons, armors, and tools
- Food and farming supplies
- Potion brewing ingredients
- Mob Drops (string, zombie flesh, gunpowder)
- Animal Drops (leather, feathers, ink sacks)
- Mining Loot (mined diamonds, gold, iron, netherite and ancient debris, etc.)
- Wool, concrete blocks, and other colorful blocks
- “Junk” chest (items you don’t use a lot of, like granite, diorite, gravel, etc)
- “Nether” chest (include all items found in the nether, including quartz, nether brick, glowstone, wither drops like nether stars, and so on)
- “End” chest (same as the nether chest but for items found in the “end”)
- Logs and Saplings
- Sand and Glass
- Other building supplies like bricks, stone, and slabs
Protect Your Storage Chests
You will need to take some steps to protect your hard earned Minecraft items and blocks. The most obvious threat is usually creepers or enemy monsters, but on multiplayer you also may need to worry about theft by other players. Always remember that on some multiplayer servers, theft and PvP activity is encouraged.
A common way to protect your storage room is to build it deep underground, or even as part of an underground Minecraft base. For even more protection, you can put strong blocks like obsidian around the outside of the room. You will get the feeling that your belongings are safe and stashed away.
Minecraft Storage Room Design Tips
- If you have a nether star, build beacons to increase run speed and health regeneration inside your storage room. This will help you get to your items faster and also heal you every time you visit your storage room.
- To make the room look more luxurious to show off your Minecraft progress, you could build with fancy materials like quartz, glass, and glazed terracotta patterns.
- It is often a good idea to build a nether portal near your storage room. This will help you drop off items more quickly after finishing in the nether. Be mindful that enemies can cross nether portals, so it should be behind a door in an attached room.
- Using slabs underneath chests attached to the wall is a cool design trick for storage rooms. This gives the appearance that your chests are resting on shelving.
- Use a “to be sorted” chest to dump your items into. Later on, you can go through this chest and organize the items into their proper locations.
- It’s possible to automate item sorting with your storage room. Check out this video for more information on automatic item sorting with hoppers.
- Use a consistent building style for your room.
Related Video
That concludes our article on the best Minecraft storage room design ideas! Do you have any suggestions or additions? Leave a comment below!


TheHypnoAlien
Tuesday 20th of March 2018
Thanks for the tip for the storage facility, this will go great for my videos, I'll be sure to link this down in the Bio of my next video.